Connect Microsoft SharePoint to analyse documents where they are stored, without downloading and re-uploading them. Hoppa reads the files through your own SharePoint access, so you can only add files you are allowed to see.
Before you start
- You need permission to connect data sources. If the Microsoft SharePoint card shows a Pro Tier badge, connecting to external systems is not enabled for your account. Contact the Hoppa team.
- You need a Microsoft work or school account with access to the SharePoint sites you want to use.
Connect your account
You only need to do this once. Hoppa then stays connected until you disconnect or the connection expires.
- Open the session.
- In the sidebar, select + next to Data sources.
- Select Microsoft SharePoint. If it shows Requires sign-in, select Connect & configure.
- Sign in with your Microsoft account and approve Hoppa's access when Microsoft asks.
Microsoft returns you to the session, with the SharePoint source open. If your account is already connected, the card shows Account connected and the button reads Continue.
Select files and folders
The left-hand panel shows the SharePoint sites you can access. Sites contain document libraries, and libraries contain folders and files.
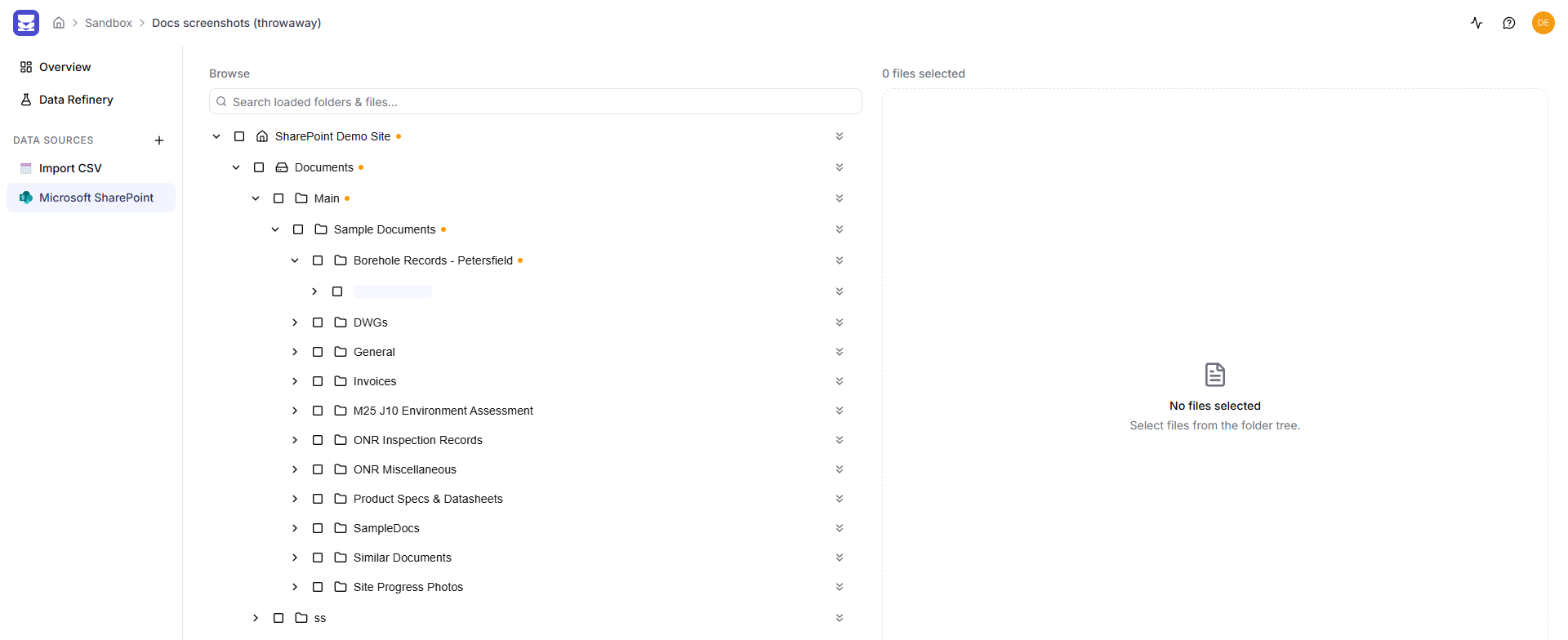
SharePoint browser showing a site, its document library and folders
- Select the arrow next to a site, library or folder to open it.
- Tick the files you want. Tick a folder to select every file currently loaded inside it.
- Check the right-hand panel, which shows how many new files are ready to add.
- Select Save.
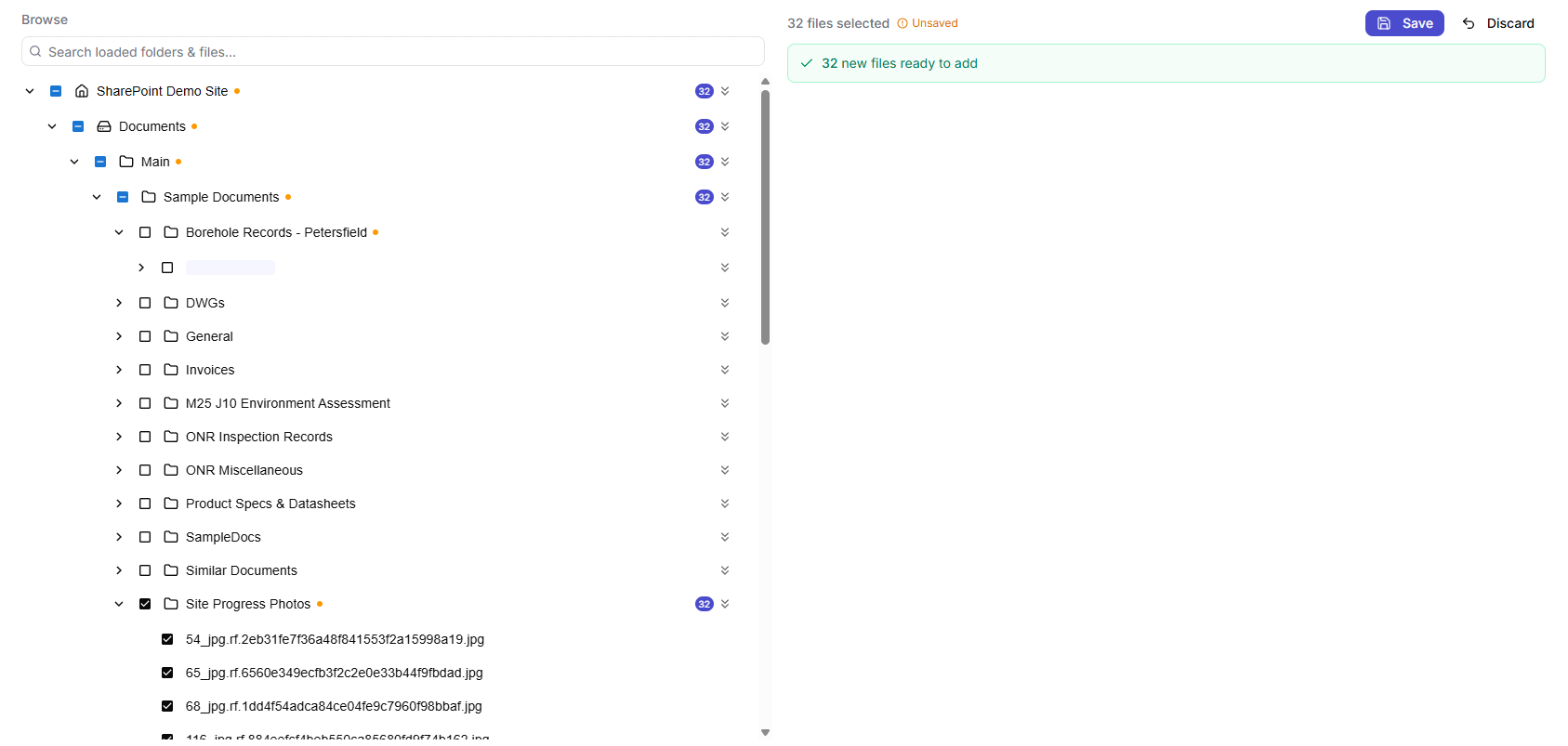
A ticked folder, with 32 new files ready to add and the Save button
Hoppa adds the files to the session. To undo your selection instead, select Discard.
Save before you move on
Selections are not saved until you select Save. If you open another part of the session first, your selection is lost.
Find files quickly
- Search loaded folders & files finds matches among the folders you have already opened. Open more folders to search deeper.
- Expand all levels below is the double-arrow icon next to a folder. It opens every level beneath that folder so you can select or search its whole contents. Hoppa asks you to confirm first, because a large folder can take a while to load.
Files are added as they are now
Ticking a folder adds the files in it at that moment. Files added to the folder in SharePoint later are not added automatically. To include them, open the source again, select the new files and select Save. Files already in the session are highlighted in green in the tree.
Remove files
- Open the Microsoft SharePoint source in the sidebar.
- Under Previously Added, tick the files to remove, then select Delete. To remove every file from this source, select Clear all.
- Confirm by selecting Remove.
Removing files from the session does not delete them from SharePoint.